This post is part of a series on how to install and configure Team Foundation Server using DNS aliases for it’s components:
In this post we’ll see how to configure Team Foundation Server to use the DNS aliases for the database and SharePoint. Here’s the aliases i’ll be using for this tutorial:
- SQL Server : sql01.demo.local
- Analysis Services : analysis01.demo.local
- Reporting Services : reporting01.demo.local
- SharePoint : sharepoint01.demo.local
- Team Foundation Server (AT) : tfs01.demo.local
Team Foundation Server (Application Tiers)
For Team Foundation Server, even if all components are on the same server we’ll have to do an advance configuration:
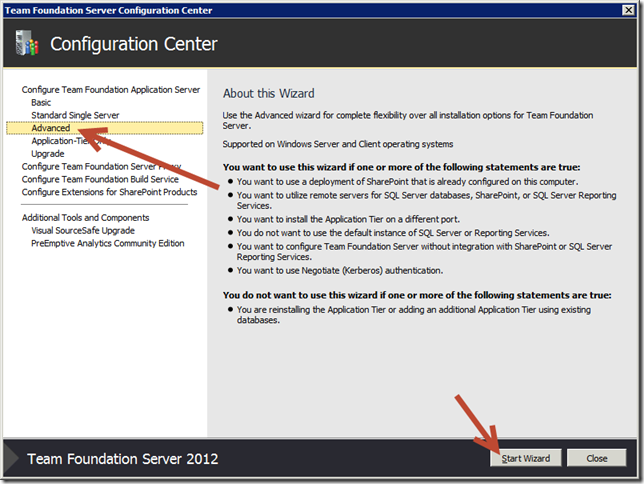
- In the configuration tool for Team Foundation Server, click Advanced then Start Wizard.
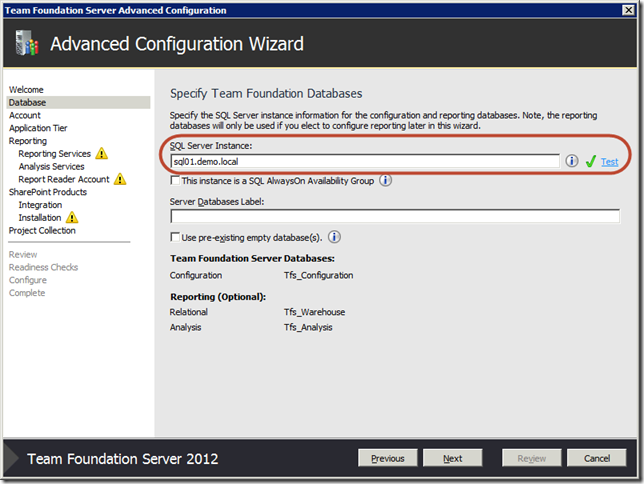
- On the Database tab, in the SQL Server Instance field enter the fully qualified DNS name (FQDN) for the SQL server using the DNS alias and click Next.
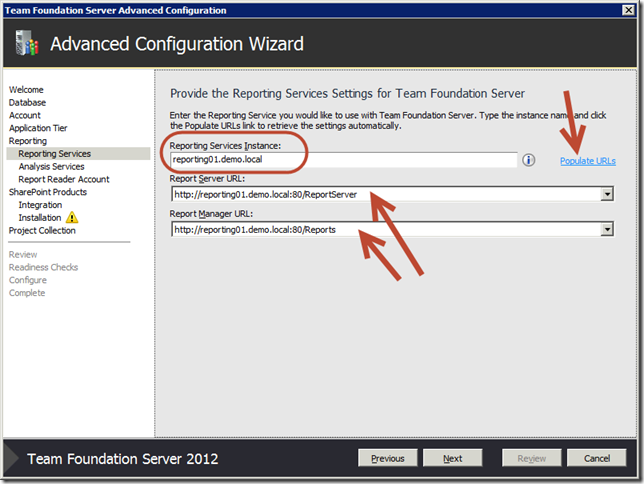
- On the Reporting Services tab:
- In the Reporting Services Instance field, enter the fully qualified DNS name (FQDN) for the Reporting Services server using the DNS alias.
- Click Populate URLs.
- In the Report Server URL list, select the entry with the DNS alias.
- In the Report Manager URL list, select the entry with the DNS alias.
- Click Next.
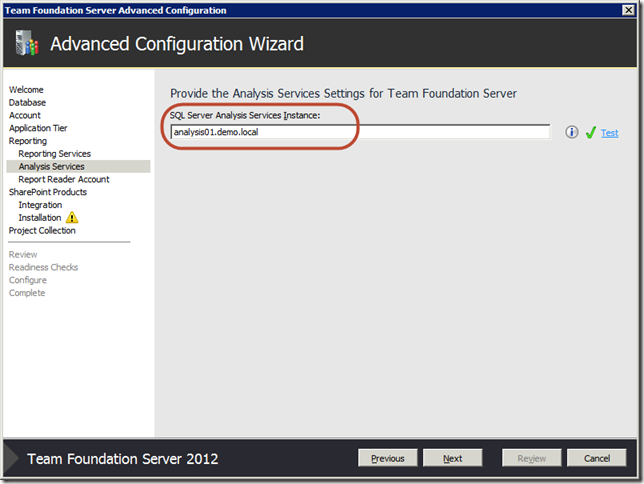
- On the Analysis Services tab, in the SQL Server Analysis Services Instance field enter the fully qualified DNS name (FQDN) for the Analysis Services server using the DNS alias and click Next.
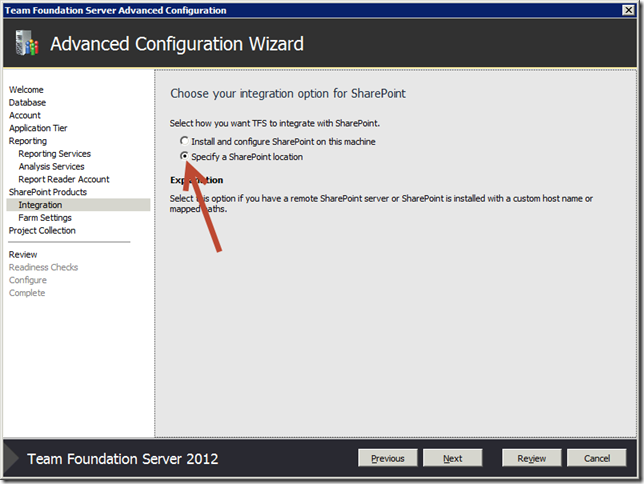
- On the Integration tab, select Specify a SharePoint location and click Next.
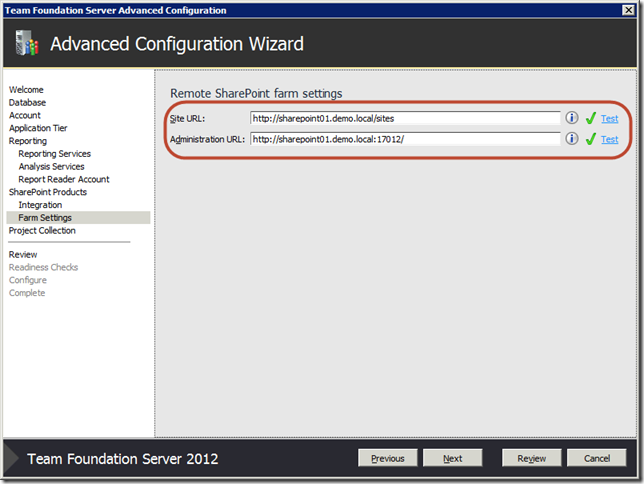
- On the Farm Settings tab:
The initial configuration is now finished. We need to configure the URL used by TFS for the web access:
- Open the TFS administration console.
- On the Application Tier tab, click Change URLs.
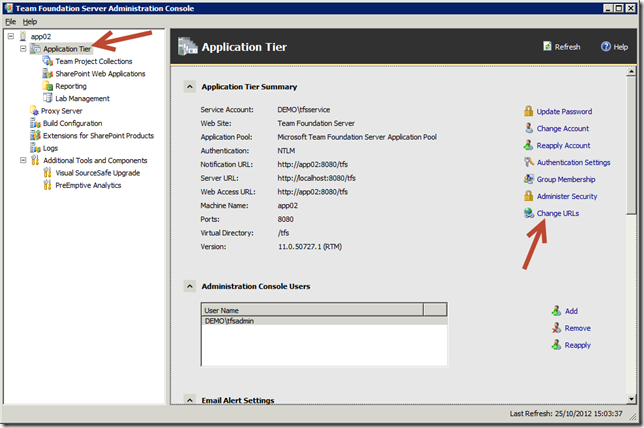
- In the Notification URL field, enter the fully qualified DNS name (FQDN) for the TFS server using the DNS alias and click OK.
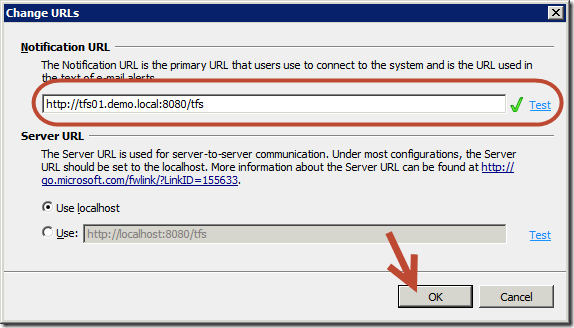
The Team Foundation Server server is now completely configured to use all the DNS aliases. The last part we need to configure is in SharePoint.
SharePoint
After configuring TFS the link between TFS and SharePoint is created but without the DNS alias. We need to go back on the SharePoint server to update the TFS extensions for SharePoint:
- On the SharePoint server, open the TFS administration console..
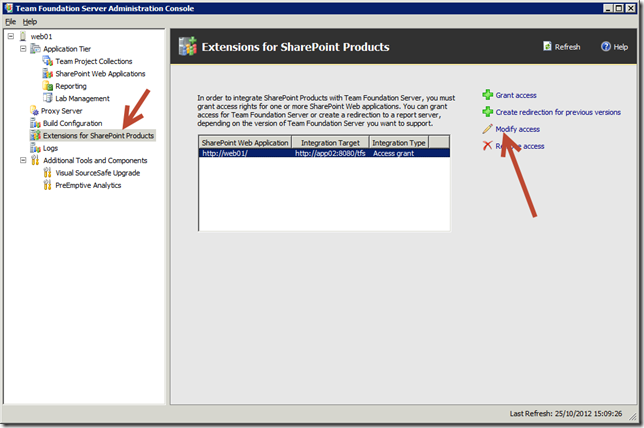
- On the Extensions for SharePoint Products tab, select the first entry in the table and click Modify access.
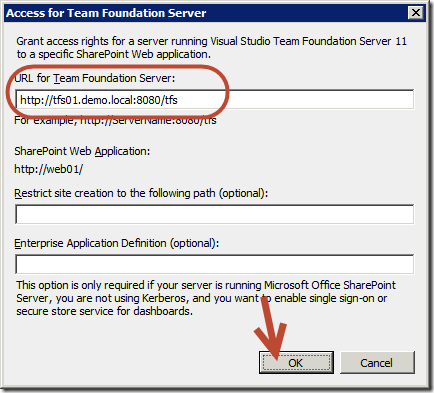
- In the URL for Team Foundation Server field, enter the fully qualified DNS name (FQDN) for the TFS server using the DNS alias and click OK.
And that’s all folks, all our TFS components are now fully configured to use the DNS aliases. If in the future you need to migrate a component to a new server no more need to rename or reconfigure your TFS platform, all you have to do is update the correct alias on the DNS server ![]()
Carpe Diem.

