This post is part of a series on how to install and configure Team Foundation Server using DNS aliases for it’s components:
- Part 1 : Data Tiers
- Part 2 : SharePoint
- Part 3 : Team Foundation Server
In this post we’ll see how to configure SharePoint to use the DNS aliases for the database and SharePoint. Here’s the aliases i’ll be using for this tutorial:
- SQL Server : sql01.demo.local
- SharePoint : sharepoint01.demo.local
SharePoint
To configure SharePoint with our DNS aliases we cannot use the integrated install with TFS, we must install it separately:
- Launch the SharePoint installer.
- Install the prerequisites.
- Start the SharePoint installation then launch the configuration interface.
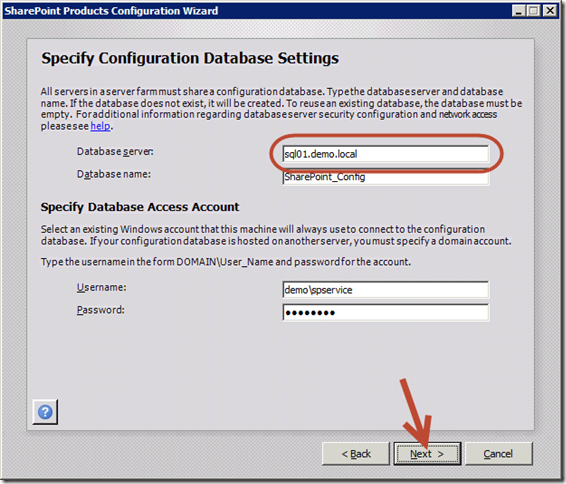
- In the Database server field, enter the fully qualified DNS name (FQDN) for the SQL server using the DNS alias and click Next.
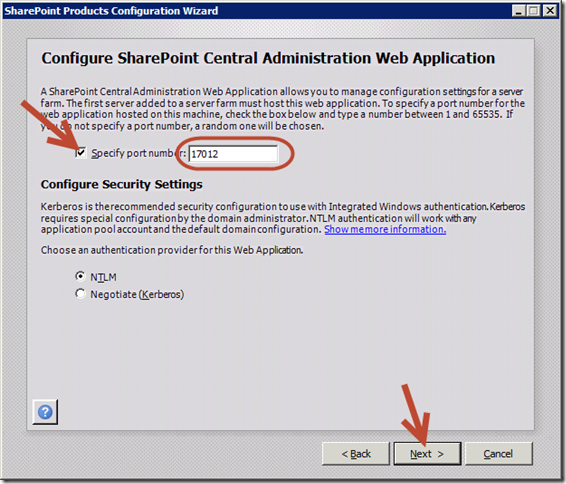
- Check Specify port number, enter 17012 for the port number to use the default port used by TFS to access SharePoint administration site and click Next.
- Finish the configuration with the configuration tool and the administration site.
SharePoint is now configured to use the DNS alias for the database. We must now configure it to respond to request made using the DNS alias sharepoint01:
- Open the SharePoint Central Administration page.
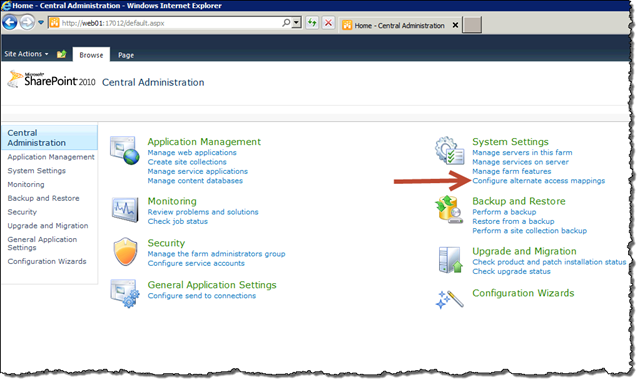
- Click Configure alternate access mappings.
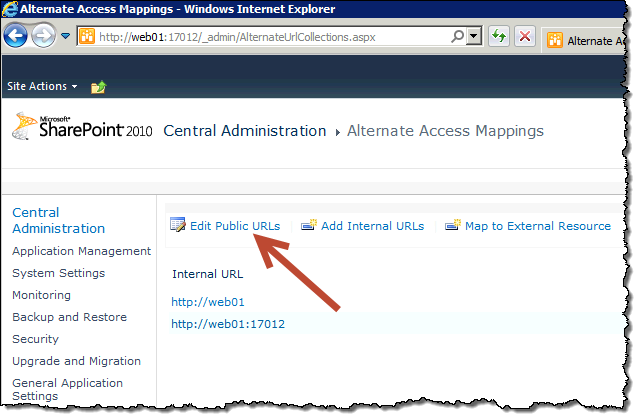
- On the Alternate Access Mappings page, click Edit Public URLs.
- In Alternate Acces Mapping Collections, select a collection using Change Alternate Access Mapping Collection.
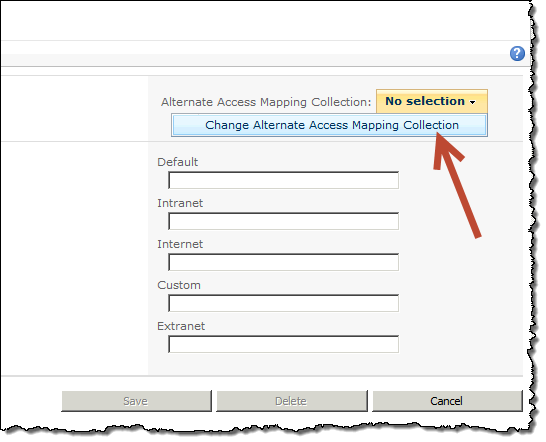
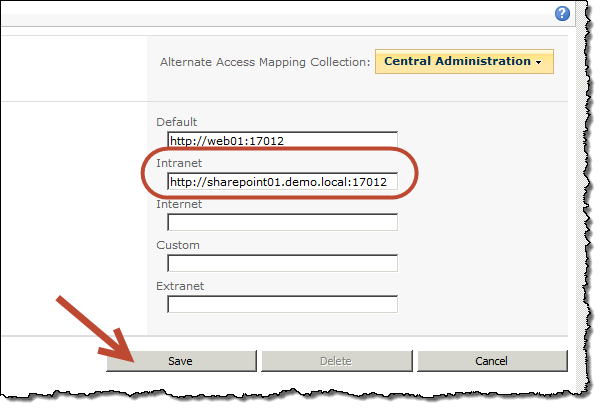
- Click Central Administration.

- In the Intranet field, enter the fully qualified DNS name (FQDN) for the SharePoint server using the DNS alias without forgetting the port and click Save.
- Click Edit Public URLs again.
- In Alternate Acces Mapping Collections, select a collection using Change Alternate Access Mapping Collection.
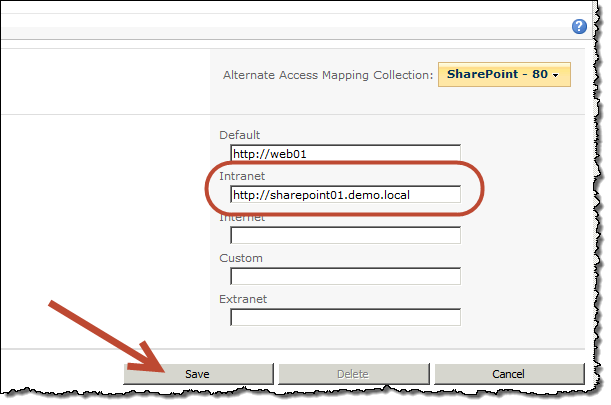
- Click SharePoint – 80.

- In the Intranet field, enter the fully qualified DNS name (FQDN) for the SharePoint server using the DNS alias and click Save.
Your SharePoint is now installed and configured to work with your DNS aliases. you can now install the TFS extensions for SharePoint as usual.
In my next post we’ll see how to configure Team Foundation Server to use all the components we just installed ![]()
Carpe Diem.
